New lockchart
In order to create a completely new lockchart that shouldn't be based on any existing lockchart users click on New lockchart button.
Please note that while navigating through lockchart creation wizard following screen header will remain visible indicating which stage of the process the user is currently at.

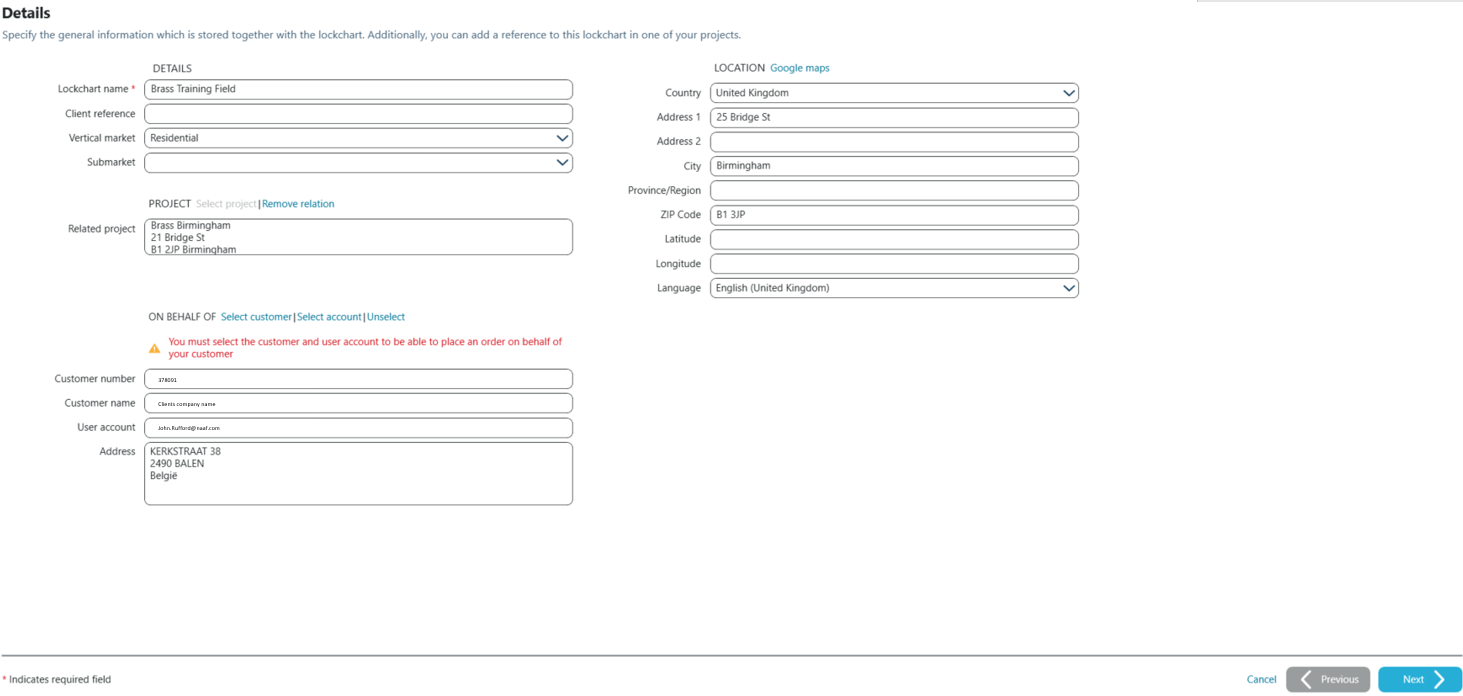
First screen is LOCKCHART DETAILS which is used to populate basic data about created lockchart.
The only mandatory field is Lockchart name. It is recommended however to populate as much information as possible to ease future identification of the lockchart.
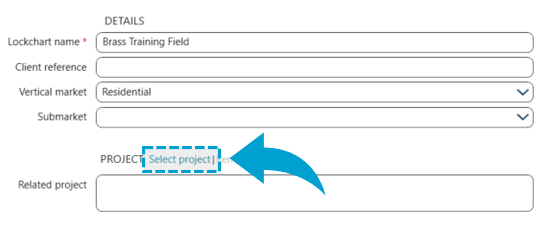
Users are enabled to associate the lockchart with existing Project. By clicking on Select project.
This can also be achieved later, by associating lockcharts in Projects menu.
While populating data in the lower section of the screen (ON BEHALF OF) it is important to note, that only lockcharts associated with appropriate customer name and user account will be enabled to place and process orders.
Please note that this section of the screen is available for Assa Abloy teams only.
After all the data has been populated users click Next button in the bottom right corner of the screen.
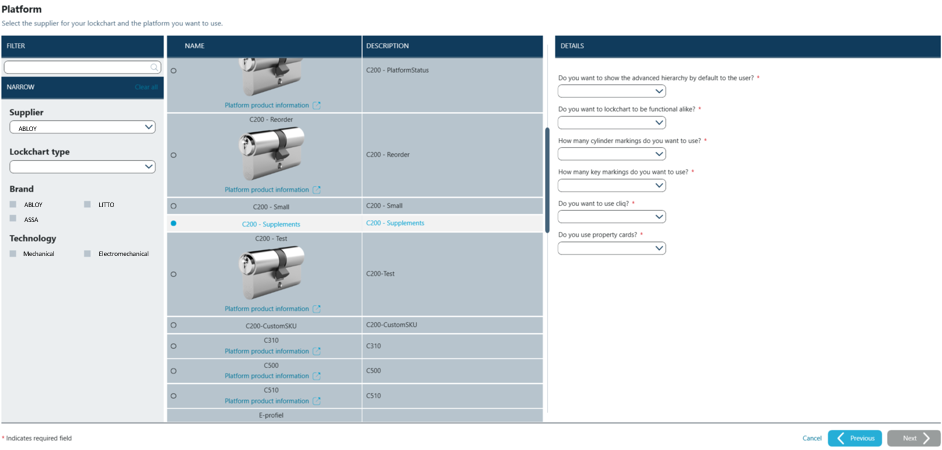
PLATFORM SELECTION screen is used to select supplier of products that will be used within the lockchart as well as to choose product platform.
Users may see different filter panes as well as different lists of available platforms depending on local offering, settings as well as product entitlements.
Depending on the settings chosen platform may require answering a couple of questions in the details pane on the right.
After the platform has been chosen users click on Next button in the bottom right corner.
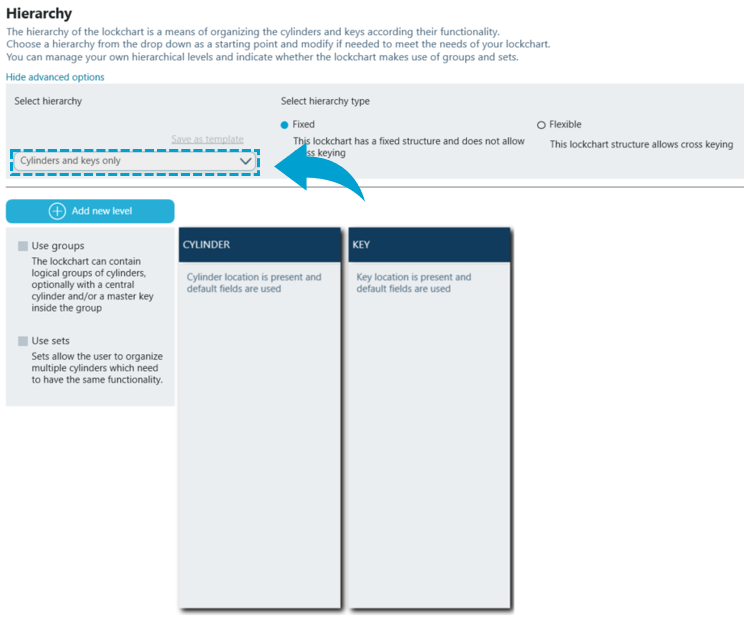
Next screen offers users ability to create custom LOCKCHART HIERARCHY, Key Studio™ offers this as a means for organising cylinders and keys according to their functionality according to their functionality.
Users are enabled to set up as many levels as required for their project. These can be levels such as site, building, floor, section etc. Each of those levels can be named according to users preference.
For example:
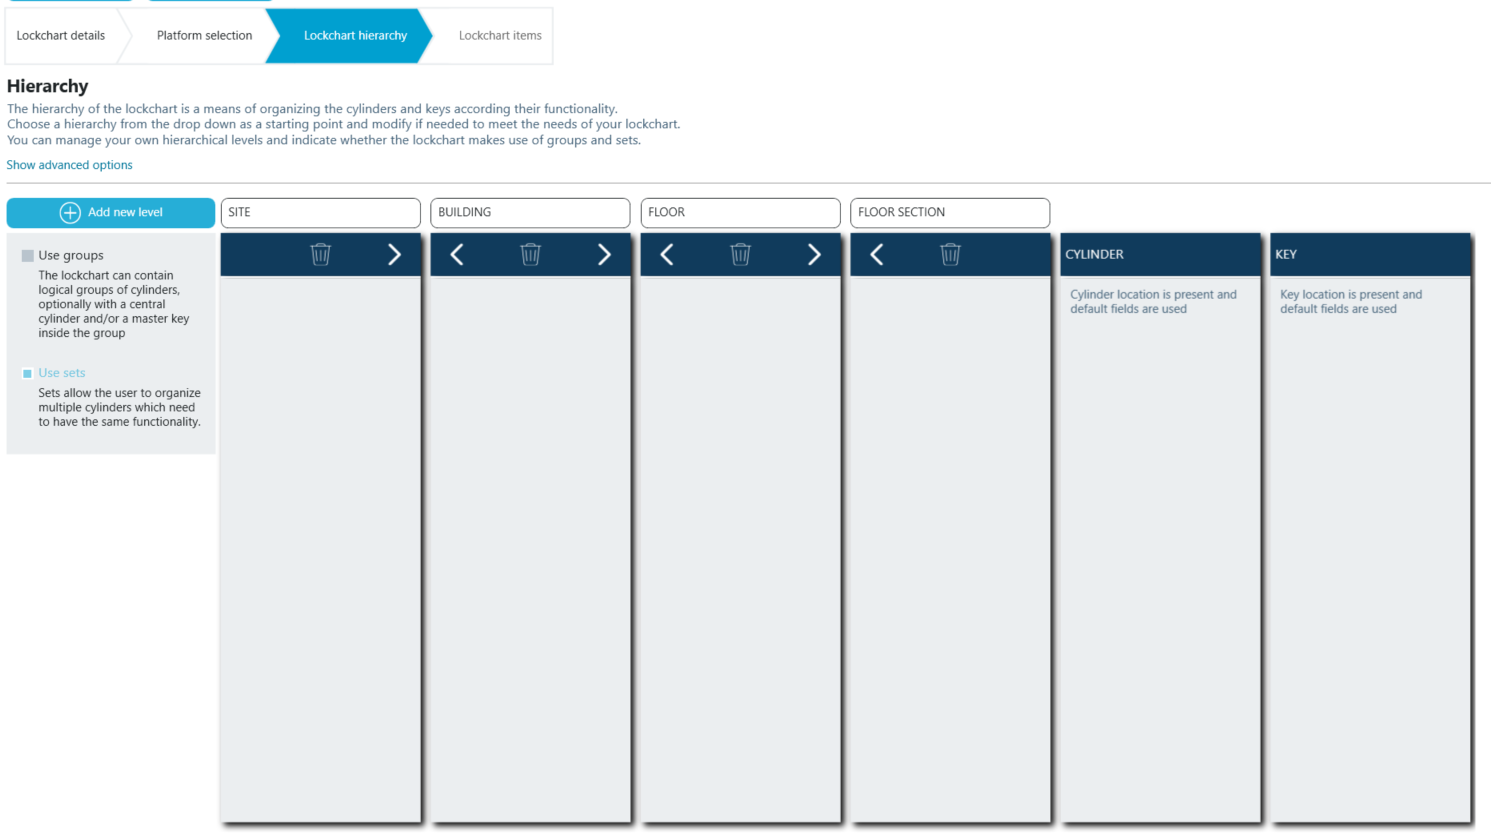
To add a new level click on Add new level button.
![]()
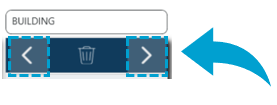
To exchange level with another one click on left or right arrow underneath level name.
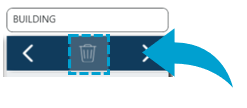
To remove a level click on the bin icon for selected level.
Lockchart hierarchy may serve as a great tool for complex projects.
For standard lockcharts which are usually created users are recommended to make use of the Cylinders and keys only option which sets up a simple lockchart structure.
After creating a hierarchy or choosing simple cylinders and keys only options users click on Next.
Last screen of the New lockchart setup wizard is used for selecting initial LOCKCHART ITEMS.
It is a recommended good practice to select items at this stage, but the users are not obliged to do so and are free to click Create and go to the next step in editing lockcharts.
These can become the lockchart default, but remain interchangeable with other items within selected platform. Users are able to modify them within the lockchart at any time.
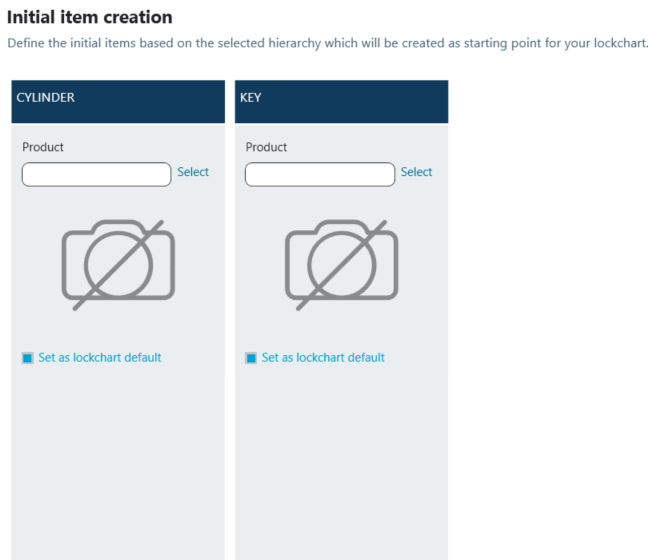
To select an item users click on Select. Pop-up window is displayed which opens product catalog. After selecting an item group from the list users can immediately set configuration parameters such as clutch, length and surface according to their preference or Use standard values option which is available at the top.

Once items have been selected and approved they are displayed within the LOCKCHART ITEMS.
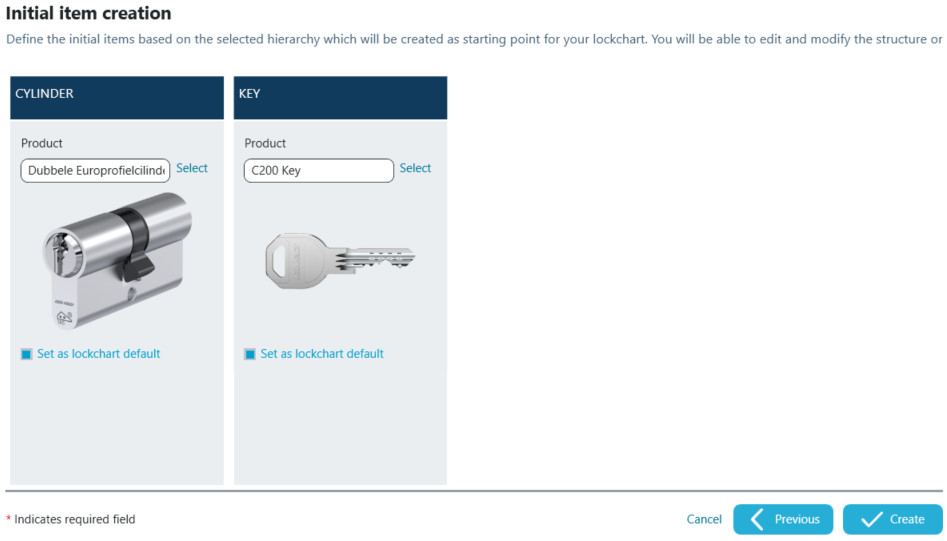
Clicking Create finalizes wizard's process and opens lockchart edit window.
For further steps in lockchart creation navigate to Editing lockchart topic.